User Help
This page is here to help users with very common usage queries. If you cannot find the answers you are looking for here, please have a look at our user guide. Failing this do not hesitate to contact our site administrators. Thank you, The CAM:IDE Team.
What Is a Project?
For the purposes of CenCom, projects are anything that will need to go through Ethical Approval or will have new data collection. We are only counting projects where the Chief Investigator is based in Psychiatry. Anything that is analysis of data that has already been collected is not a CenCom project.
When do you add a project?
A project can be added at any time in its lifecycle, however we recommend to add a project after it has passed its ethical approval stage. This is as research projects can go through a lot of changes (including names) before ethical approval. This should avoid projects being added more than once.
Request to Join a Project
You can request to join a project by going to that projects page and in the ‘Project Details’ section clicking the ‘Request to Join Project’ button.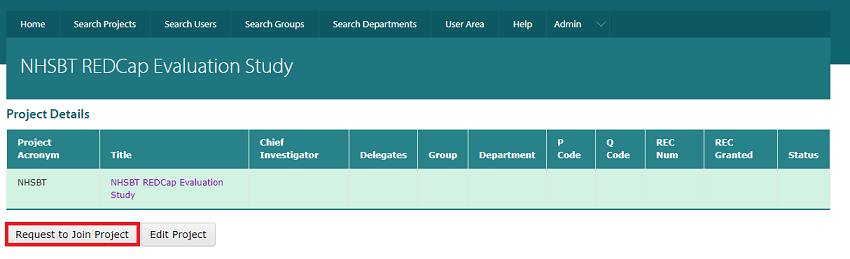
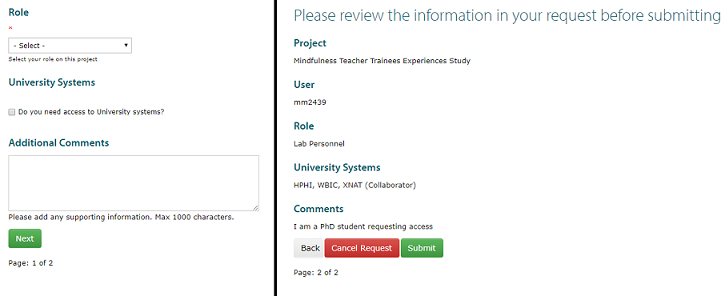
This will bring you to the Project Request Form page. Here you can choose your role on the project, ask for access to University Systems and write comments to explain why you want to join this project. After you have filled out your details, click ‘Next’. Page two of the form allows you to review the details such as the project you have requested to join, the role you have chosen and any comments you have written. After reviewing this you can cancel or submit your request. This request will be added to the Chief Investigator and/or Delegates ‘To Do List’ and they will be able to grant or deny access
Adding a Project
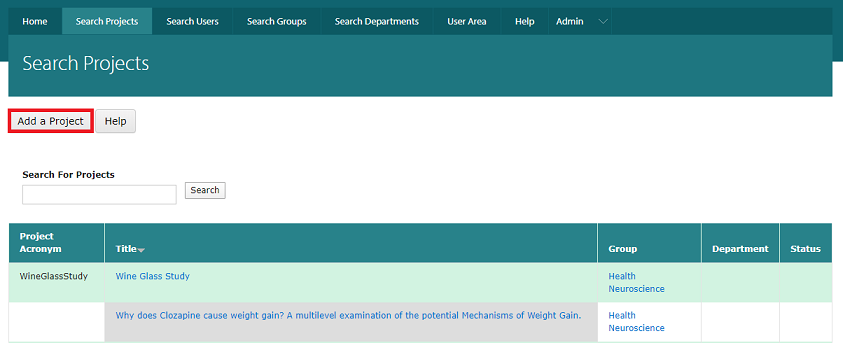
To add a new project to the database, click on the ‘Search Projects’ then click the ‘Add a Project’ button.
You will load the ‘Add a Project’ form: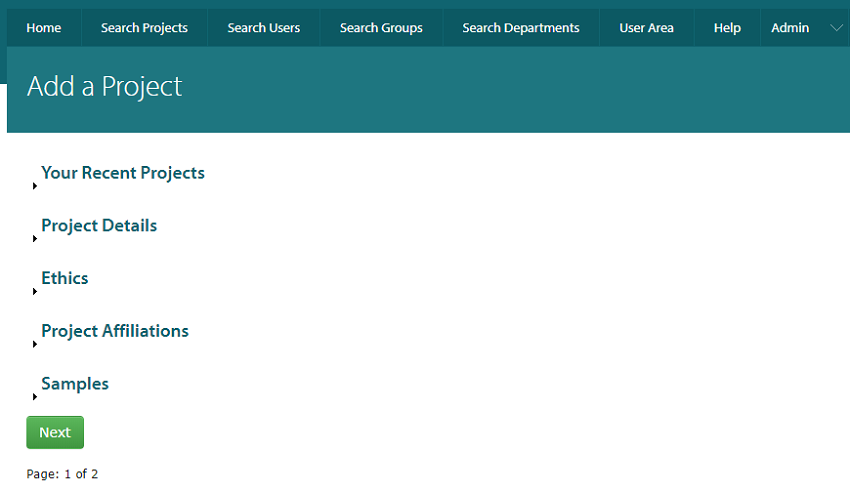
Here you can fill in details of the project you want to add. Fields that are necessary to fill have a red asterix next to them. Each text box has a small icon next that you can hover your mouse over for more information. Further down the ‘Add a Project’ form, you will see the ‘Project Affiliations‘ section. The first option asks you to choose a department. This should be the department within the University of Cambridge that this project falls under. If this a joint project with multiple departments in the university, please chose the department that the Chief Investigator is part of. If your department is not on the list, please select ‘Other’, and type in the name of your department when the text box appears. This will be moderated and an administrator will need to approve this name, this is a measure to ensure to prevent duplications. After you choose a department, you will see the ‘Chief Investigator or Delegate’ section appear. If you are the Chief Investigator you can skip this section. If you are not the Chief Investigator, then you will need to tick this box. If you ticked the box, you will see the following options appear that you will need to fill out. The list of Chief Investigators will be determined by the department you choose. If you are collecting any samples, please tick the box in the ‘Samples’ section. This will display a list of possible samples that you may be collecting. You can then click the ’Next’ button to go to the next page where you can review the data that you have just entered. After checking the data, you can click submit to proceed. After clicking submit, your project will be added to the database and you will be taken back to the ‘Search Projects’ page and you will see your project listed in the table.
Updating Project Details
A ‘Chief Investigator’ or ‘Delegate’ can update details of a project by navigating to the project overview page and clicking on the ‘Edit Project’ button. You will see the ‘Edit Project’ form pop up. You can edit any of the details of the project, and click the save button. Your changes will appear in the ‘Project Details’ table.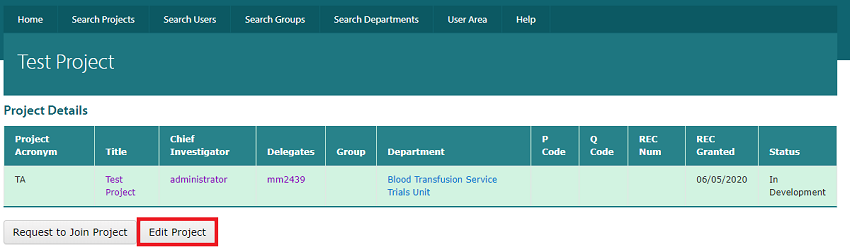
Adding a User to a Project
To add a user, navigate to the page of the project you want to add a user to. Scroll to the ‘Users on Project’ section and click the ‘Add user’ button. The ‘Add New Users’ form will pop up

- In the User ID box, type in the users Raven ID (E.G jb898) you will not need to write any part of their email address.
- Select the users role on this project from the dropdown list.
- If you wish to give this user ‘Delegate’ privileges, which allow them to add, remove or edit project or user details, then tick the delegate box.
- If you wish to grant this user access to this projects REDCap database, HPHI resources, Safe Haven, or R studio, you can tick the box next to those fields (you can give or remove access later if you wish to).
- For access to XNAT, you will need to choose the level of access you grant this user: Collaborator, Owner or User
- You will need to set a date for approval and for removal. The ‘Date Removed’ will remove this user from this project on Cencom and also remove access from all of this projects software systems that this user has been granted access to.
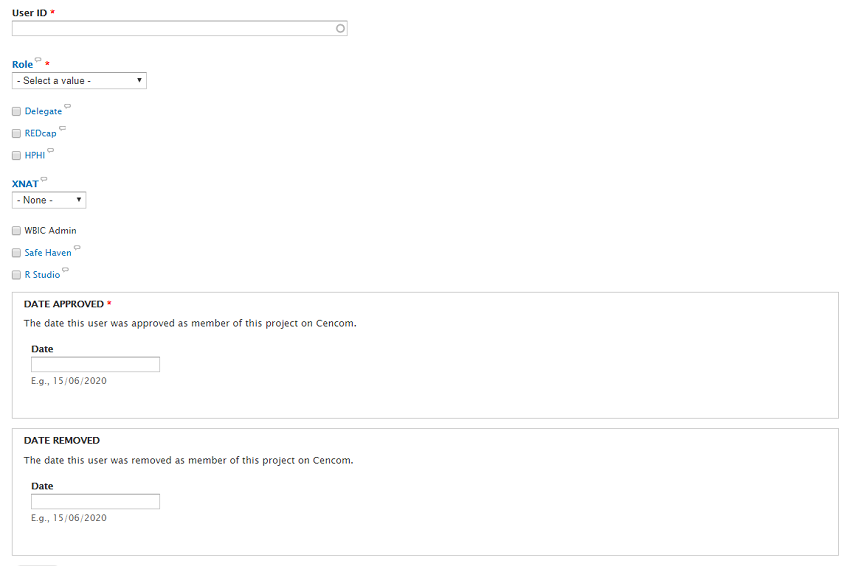
After you have entered the users details, click save, and the user will be added to Cencom. It may take a few days for the user to have access to any software or systems you have granted them access to.
Grant Access to University Systems
Cencom can be used to grant or revoke a user’s access to project resources on the following systems: REDCap HPHI XNAT R Studio To do so, navigate to the page of the project, scroll to the ‘Users on Project’ section, find the user in the table and click on the Edit button.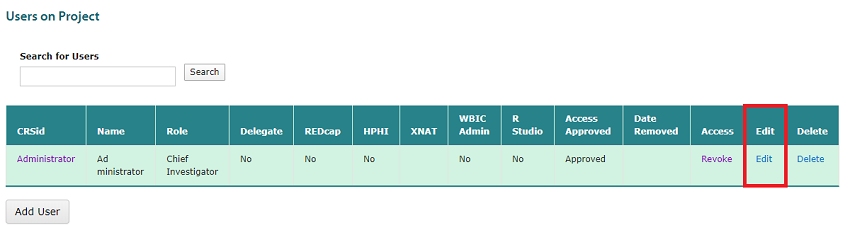
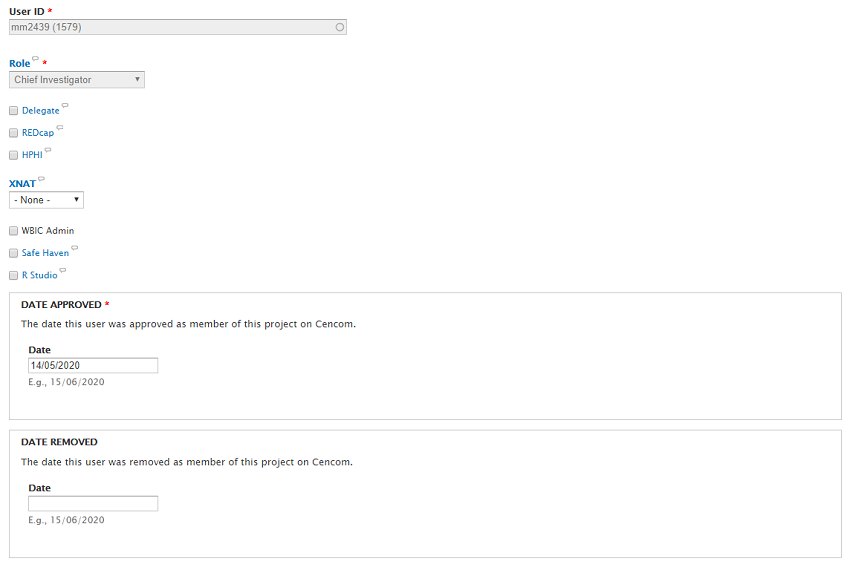
This will display a form with this user’s details on this project. From here, you can tick the box next to any of the fields that you want to grant access to.
- To grant access to XNAT, click on the XNAT dropdown and select the level of access you want to grant: Collaborator, Owner or User.
- If you know the date you want this user’s access to your projects systems to be revoked, enter that date in the ‘Date Removed’ section.
- After you have selected the systems you want to give this user access to, click the save button at the bottom.
- This will start a process that will grant the user access to the systems that you have selected. Depending on what you selected, this will be immediate, or it could take a few days.
Review Project Requests
The ‘To Do List’ can be found under the User Area section. The ‘To Do List’ section is a list of any users who has requested to be added to a project that you are a ‘Delegate’ or ‘Chief Investigator’ of. You will have to click on the ‘Review’ button to proceed.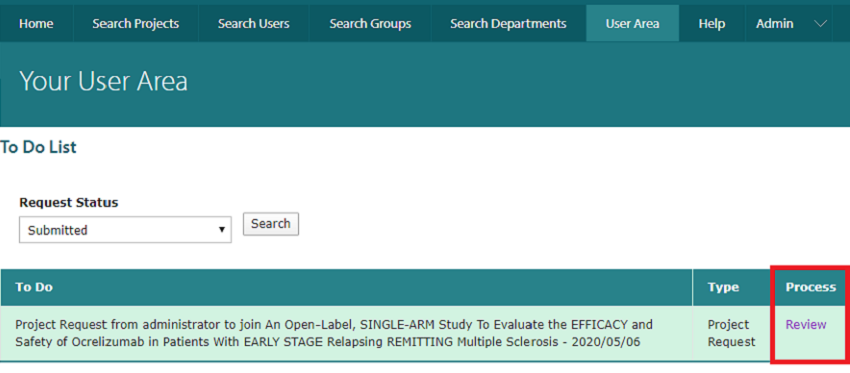
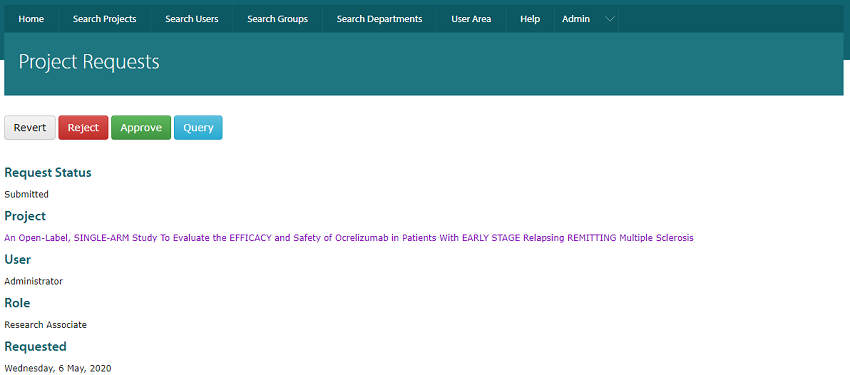
You will be redirected to the project request response page. You can choose to ‘Approve’, ‘Reject’ or ‘Query’ this request. You can always change this decision by clicking the ‘Revert’ button. The user will be informed of your decision after you have made a choice.
Remove a User from a Project
In some instances, you may find it necessary to set a removal date for a user from a project. To do this navigate to the project page and scroll to the ‘Users on Project’ section. Find the users name in the user table and click on the edit button on the user’s row.
On the form that pops-up, scroll to the ‘Date Removed’ section and enter the date you want this users access to be revoked. Click on the save button.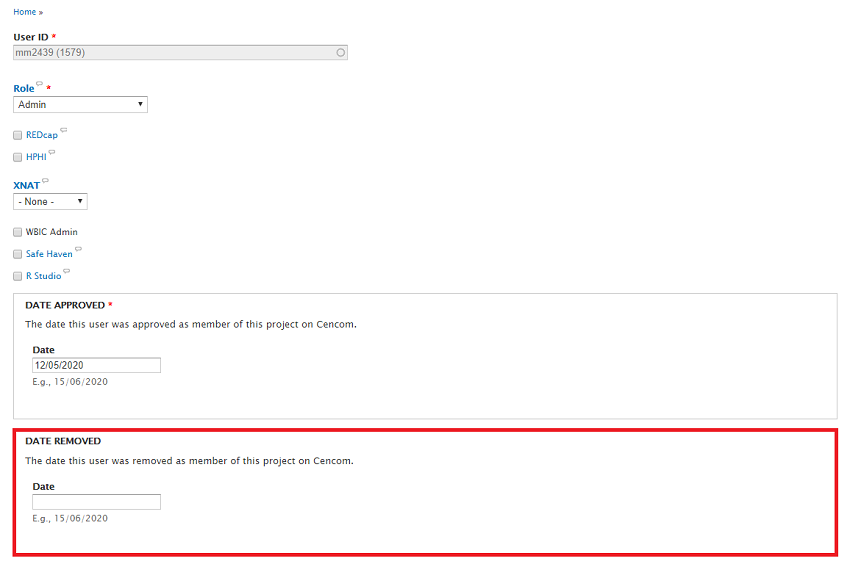
Once this date passes, the users ‘Access Approved’ status will say ‘Rejected’. To remove users with immediate effect see Revoke and Envoke User Access
Revoke and Envoke User Access
To easily grant or remove access for users to your Project with immediate effect we have the Revoke & Envoke functionality. Navigate to your project overview page. Under the 'User Management' banner find the User whose access you wish to remove or restore. Use the Revoke/Envoke link to remove or grant access, respectively.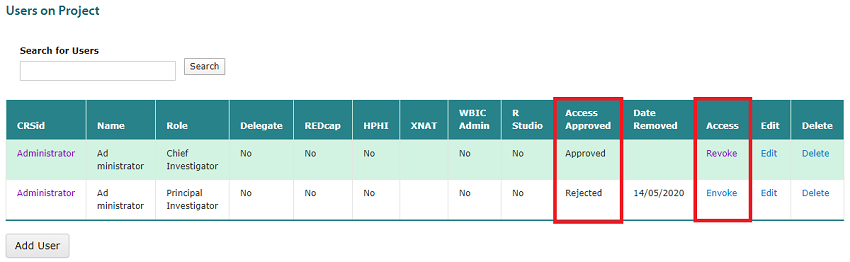
Note: You must be an 'Approved' Chief Investigator or Delegate on the Project to have this functionality.